Pages

Tuesday, November 29, 2016

Which type of cat is best for you?

Our most recent graphic design project was to create an infographic based on whatever we wanted as long as we a did actual research on our subject. I chose to try and make a flowchart based on which breed of cat would belong with which type of person.

Concept

In the beginning I knew I wanted to do something having to do with cats. I love cats, and I've always wondered if there are certain cats that would work best with certain people. So I decided to research how the most popular house cat species behaved, and then matched up their personalities with what people might be looking for in a cat.

Process

Creating the flowchart proved to be difficult. I had all of the information down, but had trouble trying to fit them evenly in the space I had. I decided to have each box either be an inch or half an inch long, and then have them fit onto different tiers. I didn't want my flowchart to be messy and just spread out everywhere; I wanted order in my work, and I think that was what made trying to fit all of the information together hard. Eventually though, I did figure out a good layout, and filled up any blank spots with silhouettes of different cats.

My vision

When I started trying to come up with what I wanted to do, I know I wanted the final product to be cute, since I think cats are really cute and that colors that are typically deemed cute tend to be pleasing to the eye. I went with rather rather light pink colors for the different decorative pieces such as the borders around the boxes and the cat silhouettes. For the wording I chose a bolder, darker pink so that reading it would be easy. I tried to make the background simplistic so that it didn't distract from the viewers from the actual flowchart, but I added transparent white circles so that it wouldn't be boring either. I'm very happy with how my final piece came out, and I feel like it stayed true to what I initially wanted.

Thursday, November 10, 2016

Story Animation

Another thing we did recently (before we learned about Maya, actually) was create our first story animation with After Effects. This was, by far, one of the biggest and most stressful things I've done in all of e-Comm so far, other than the big group projects we did last year, but I'm proud that I powered through and proud of my work.

Pre-Production

My storyboard
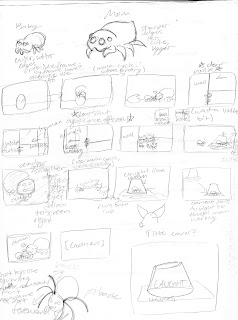
When our teacher first told us that we would be writing a short story, and then animating it, I had millions of ideas flying through my head. My main thought was that I wanted something cute. I remembered a spider that I had found in my bathroom several days prior, and how I had put them on a piece of paper, under a cup, and let him outside. I thought of what might have been going through the spider's mind, and what they thought when they got outside. I realize that spiders don't raise their offspring, but keeping with the "cute" theme, I thought up a small spider family, made up of a mother and child, living in a human's bathroom.

Production

Storyboarding for this was fun; I love spiders and I love drawing them. I really liked the way my designs looked on paper, but unfortunately my digital art skills aren't as good and they didn't translate well onto the computer. My story, however, was overshot. I set my standards a bit too high for myself and my abilities. I had to shorten and simplify my story once I hit production because of time limitations, which made me a bit upset, but what can I do when it's my first major project in my sophomore year of high school animation.

Trouble with After Effects

Finished baby spider design
Another bit that made creating this so stressful was working with After Effects. After Effects was easy for me to manage when I had a few different layers and such, but once you throw in more than one character, backgrounds with five plus layers, and multiple different scenes, things get troublesome. Once I had finished creating my backgrounds and characters, I needed to figure out a way to put it all together into a story, which was very overwhelming. Eventually, I calmed down and thought it through. The final project did eventually come out and I'm very proud of the work I've done for my first big project in this class.

Post-Production

After almost everyone else in class had finished their animations, we watched and critiqued each other. There were no harmful words towards each other, only what we liked, and thought needed work on our animations. I was told that mine was well done, though there were somethings that I needed to fix, such as some timing issues and objects that didn't fit the aesthetic of the rest of the animation. Unfortunately I wasn't able to get to any of these things since I had deadlines to meet.

Conclusion

I really wish I had set my standards lower for myself. That was probably the main cause of my stress, and the rushing of my project. I'm proud of myself for having overcome my stress and finishing the project, but I'm upset that I almost let the stress get to me. For our next big project I'll probably try to take things easier on myself and try to stay after and work on things at school.

Castle

My castle.

New program

Recently in animation we've been learning about Maya, a 3D modeling program. There's a lot that goes into Maya and learning how to use it, so we started out small and created a simple castle. 

Learning Maya

In order to learn to make the castle, we needed to first learn how to use Maya. We started out by learning what makes up shapes in 3D programs-- polygons. There are different simple shapes in Maya, such as the cube, sphere, and pyramid. These shapes are put together and modified to create more complex shapes, much like my castle.
A better look at the towers and moat.

Building the castle

The castle was our way of putting our knowledge of simple shapes into making complex shapes. We started out with a simple cylinder, which we then cut an area out of for guards or soldiers to stand with blocks extruding up from the top of the wall. Once we were done with one tower, we could copy and paste it to create three more. The walls were then added by creating a rectangular prism that was connecting two of the towers at the height you want your wall to be. After we made the base of the wall, we made subdivisions to have extruding out the top, much like the towers. We could then copy and paste the wall three times like we did with the towers and make a cube to cut out the gateway with.

Extra editions

After the base castle was built, we needed to add something extra. I decided to make a ground and a moat by making a rectangular prism and cutting out a hole, and then making another rectangular prism as the island the castle sits on.

Sand and water

Adding the textures was fairly simple, since all I needed to do was set up a shader to create some sort of depth, and then add a texture to said shader. I chose sand, to make my castle appear like a sand castle. The water texture and shaders were already built into Maya, and I didn't need to do any searching for textures.

Last thoughts

Creating the castle really helped me learn a lot about modeling in Maya. Currently, we are just beginning to learn about lighting, which has made my projects look a lot more life-like than what was seen in my castle's images.